Sourcing Guide: Paint Rollers and Covers
Jan. 24, 2022There are many do-it-yourself projects that can save money without having any negative impact on the results - however, painting is not one of them. For paint jobs with a professional look, you need to start with quality tools.
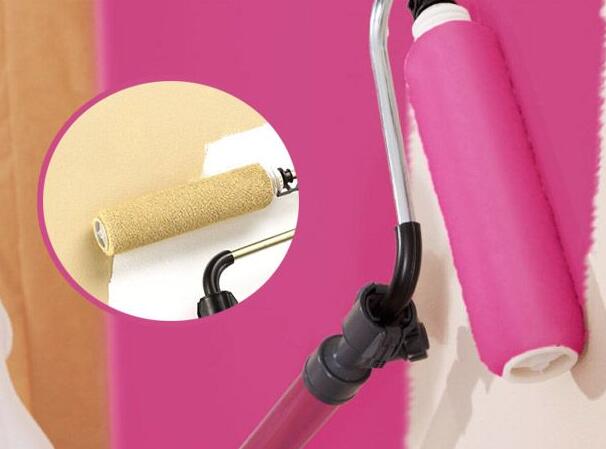
You may reach for a paintbrush when cutting or painting trim, but covering most walls or ceilings with paint is much easier and faster when you use a paint roller. Not only that, but the right roller and cover combination applies paint smoothly and evenly, so no brush strokes, blotches or other imperfections are left behind.
Paint rollers and covers are simple and often quite affordable tools, but there are many options to choose from.

Finding the right paint roller for the job
1. Choose a roller frame that is easy to grip.
The roller frame - the backbone of this reusable painting tool - is basically a comfortable plastic handle that attaches to the roller cage (the part of the frame that slides into the roller cover). Usually, the ends of the roller cage have plastic caps that support the compressed metal "ribs" that fit inside the caps and hold them securely in place, but you'll also find roller frames with sturdy plastic cages.
For convenience, roller frames are sold in sets with covers, but when purchased separately, you can have better control over the quality of your supplies. When comparing frames, look for the following optional features.
✴ Ergonomic handle. If you want to spend a lot of time painting, even in more than one room, it's worth spending a little more for an ergonomic handle that's shaped to take pressure off your wrist.
✴ Ball bearings. A quality roller frame with ball bearings provides a smooth rolling motion and a more perfect finish.
✴ Threaded handles. Although it appears on most roller stands, check the bottom of the handle for threads or clips so you can attach extensions to handle the ceiling or top of the wall.
2. Narrow your roller length options.
Roller frames and lids come in several different lengths (while most frames have fixed roller widths, some larger frames are adjustable in size, using small clips or forks to hold the lid in place instead of the cage). If you want to get the job done correctly, you need to match the length of the roller frame and the shroud.
A ✴9-inch roller is the best size for most projects tackled by DIY hobbyists. For beginners, these paint rollers fit easily into a 5-gallon paint bucket. Plus, they're large enough to cover a decent-sized wall sample in one roll, but not so long that it's difficult to control trim and other details.
Rollers that are ✴12 inches or longer can be a bit heavy and bulky, so professionals use them more often than DIYers. However, if you really need to cover a section of wall quickly, you may want to choose one of the oversized rollers.
The ✴6-inch or 7-inch rollers are great for painting skirting molding or small furniture. These rollers can also be used to get into corners or get behind the toilet to paint walls.
✴ 4-inch mini rollers are great for trim, small furniture, tight spaces or working carefully around fixtures, window sills or other obstacles. They also come in handy for painting the inside of cabinets or bookcases.
3. Choose the right roller covering material for your paint and project.
There are five common materials available for coverings, and they vary in terms of the most appropriate paint to use, the amount of accommodation and the texture created.
✴ Natural fiber wool or mohair roller covers are the best choice for applying oil-based paints, but they are suitable for any finish and can smoothly cover a variety of surfaces. Wool absorbs a lot of paint, so only one coat is needed to provide excellent coverage.
✴ Synthetic roller covers - including polyester, nylon or polyester - are the right choice for water-based emulsion paints because they resist matting. You can use synthetic coverings with any paint finish on most surfaces. While synthetics don't absorb and hold as much paint as wool does, they are usually very durable.
✴ Blended wool and polyester roller covers can be used with any kind of paint and any paint finish, so this is a great option if you switch between oil-based and water-based products frequently. These versatile roller covers combine the best of both worlds: if properly maintained, they will absorb a lot of paint and last a long time.
✴ For newer painting scenes, microfiber roller covers (identifiable by the diagonal stripes on the plush cover) are used with latex and oil-based paints with matte, eggshell or satin finishes. These rollers provide a very smooth surface, almost like spraying, and are only suitable for surfaces that do not have much texture. However, achieving an even finish with microfiber rollers requires some learning curve, as they absorb and release more paint than regular coverings, so practice on cardboard or other disposable surfaces before treating walls.
✴ Foam roller covers do not last as long as other options, and are therefore sometimes considered "disposable" covers. They are best for rolling semi-gloss or high-gloss latex paint on smooth (not heavily textured) surfaces. Use them for quick touch-ups on trim, skirting, furniture or other small projects.
You also need to consider the core of the roller cover; a good one is made of some type of resin or plastic. Cheap rollers have cardboard cores; they don't hold well and often come apart after a few uses.
4. know what naps your surface needs.
The pile of the roller cover is the length of its fibers - another important decision to make based on the project at hand. Different naps apply to different surfaces. As a general rule, the shorter the nap, the smoother the surface you are using. Using a long nap on a smooth surface tends to produce an uneven finish, while using a short nap on a rough surface will usually tear the fibers or shed them into the paint.
A ✴1/4-inch pile is best for very smooth walls, ceilings, cabinets and other untextured surfaces, including metal.
✴3/8-inch fleece is suitable for lighter textured surfaces, including most interior walls.
✴ For moderately textured walls, paneling and painted brick or concrete, 1/2-inch nap a good length.
✴3/4-inch nap is best for roughly textured surfaces, such as bare brick or concrete, or textured interior walls, such as popcorn-textured ceilings.
✴1-inch and larger nap can be used for stucco, cinder blocks, or rough brick.


