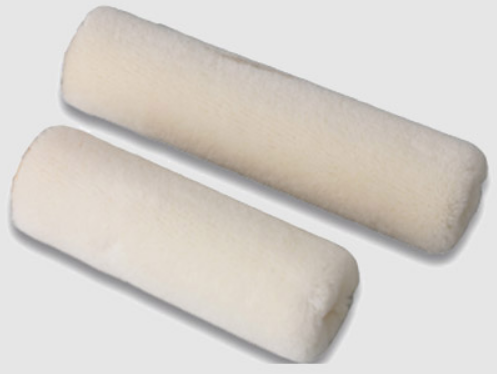
How to Use a Velour Mini Paint Roller Effectively
Mar. 10, 2025When it comes to achieving a flawless finish in painting, selecting the right tools and using them correctly can make all the difference. Velour mini paint rollers are among the most versatile tools for professional painters and DIY enthusiasts. Known for their smooth application and suitability for various surfaces, these rollers are perfect for small-scale projects or intricate detailing. This guide will delve into how to use a velour mini paint roller effectively, from preparation to application and cleanup.
What is a Velour Mini Paint Roller?
A velour mini paint roller is a compact version of the traditional paint roller, featuring a velvety nap that provides exceptional coverage and a smooth finish. These rollers are ideal for painting:
- Cabinets and furniture
- Walls and ceilings in small spaces
- Trim, moldings, and corners
- Surfaces that require a streak-free finish, such as doors or panels
Velour rollers work well with both oil-based and water-based paints, making them a versatile choice for a range of applications.
Preparing for Painting with a Velour Mini Paint Roller
Step 1: Choose the Right Roller
To maximize efficiency, select a velour mini roller with the appropriate nap length. For smooth surfaces like metal or glass, opt for a short nap (around 3 mm). For lightly textured surfaces, a medium nap works best. The size of the roller should also correspond to the scale of your project.
Step 2: Prepare Your Workspace
Proper preparation is crucial for achieving professional results. Here’s how to get your workspace ready:
1. Clean the Surface: Remove any dirt, grease, or dust from the area to ensure the paint adheres smoothly.
2. Tape and Protect: Use painter’s tape to mask edges and cover nearby surfaces with drop cloths to prevent accidental splatters.
3. Stir the Paint: Ensure the paint is thoroughly mixed to maintain uniform consistency.
How to Load Paint onto a Velour Mini Paint Roller
Efficient paint loading is essential for an even application. Follow these steps:
1. Pour Paint into a Tray: Fill the well of a paint tray with paint, leaving enough room for the roller to roll freely.
2. Roll in the Paint: Dip the velour roller into the paint without submerging the entire roller.
3. Even Out the Paint: Roll the roller back and forth on the ridged part of the tray to distribute the paint evenly and remove any excess.
Painting Techniques for a Flawless Finish
Step 1: Start with Smooth, Even Strokes
Apply the paint using long, smooth strokes. Begin at one edge of the surface and work methodically toward the other end, overlapping slightly with each stroke to prevent streaks or gaps.
Step 2: Maintain Consistent Pressure
Avoid pressing too hard on the roller, as this can cause uneven application or leave marks. Instead, apply gentle, consistent pressure to let the roller glide smoothly across the surface.
Step 3: Work in Small Sections
To maintain a wet edge and prevent lap marks, focus on one small section at a time. This technique is particularly important for larger surfaces.
Tips for Specific Applications
For Trim and Moldings
Use a steady hand and roll carefully along the edges. For corners, tilt the roller slightly to reach all angles without applying too much paint.
For Cabinets and Furniture
Roll slowly and evenly across flat surfaces. To tackle intricate details, pair your velour roller with a small brush to fill in crevices.
For Walls and Ceilings
When working on walls or ceilings in small rooms, the velour roller’s compact size ensures better maneuverability. Use a ladder for high spots and extend the roller’s handle as needed.
Common Mistakes to Avoid
1. Overloading the Roller: Excess paint can lead to drips and uneven application. Always ensure the roller is well-balanced with paint.
2. Skipping Surface Prep: Neglecting to clean and tape the surface can compromise the finish.
3. Rushing the Process: Allow each coat to dry completely before applying additional layers to avoid smudging or streaking.
Conclusion
Using a velvet paint roller effectively can elevate the quality of your painting projects, ensuring a professional-grade finish every time. By choosing the right roller, preparing your workspace, and employing proper techniques, you can achieve seamless results on various surfaces.
If you’re looking for a trusted supplier for painting tools or have questions about selecting the right products, don’t hesitate to contact us. We are here to provide expert guidance and premium-quality supplies for all your painting needs.


